Thursday, March 26, 2020

Cat's Corner Cafe Paint and Play

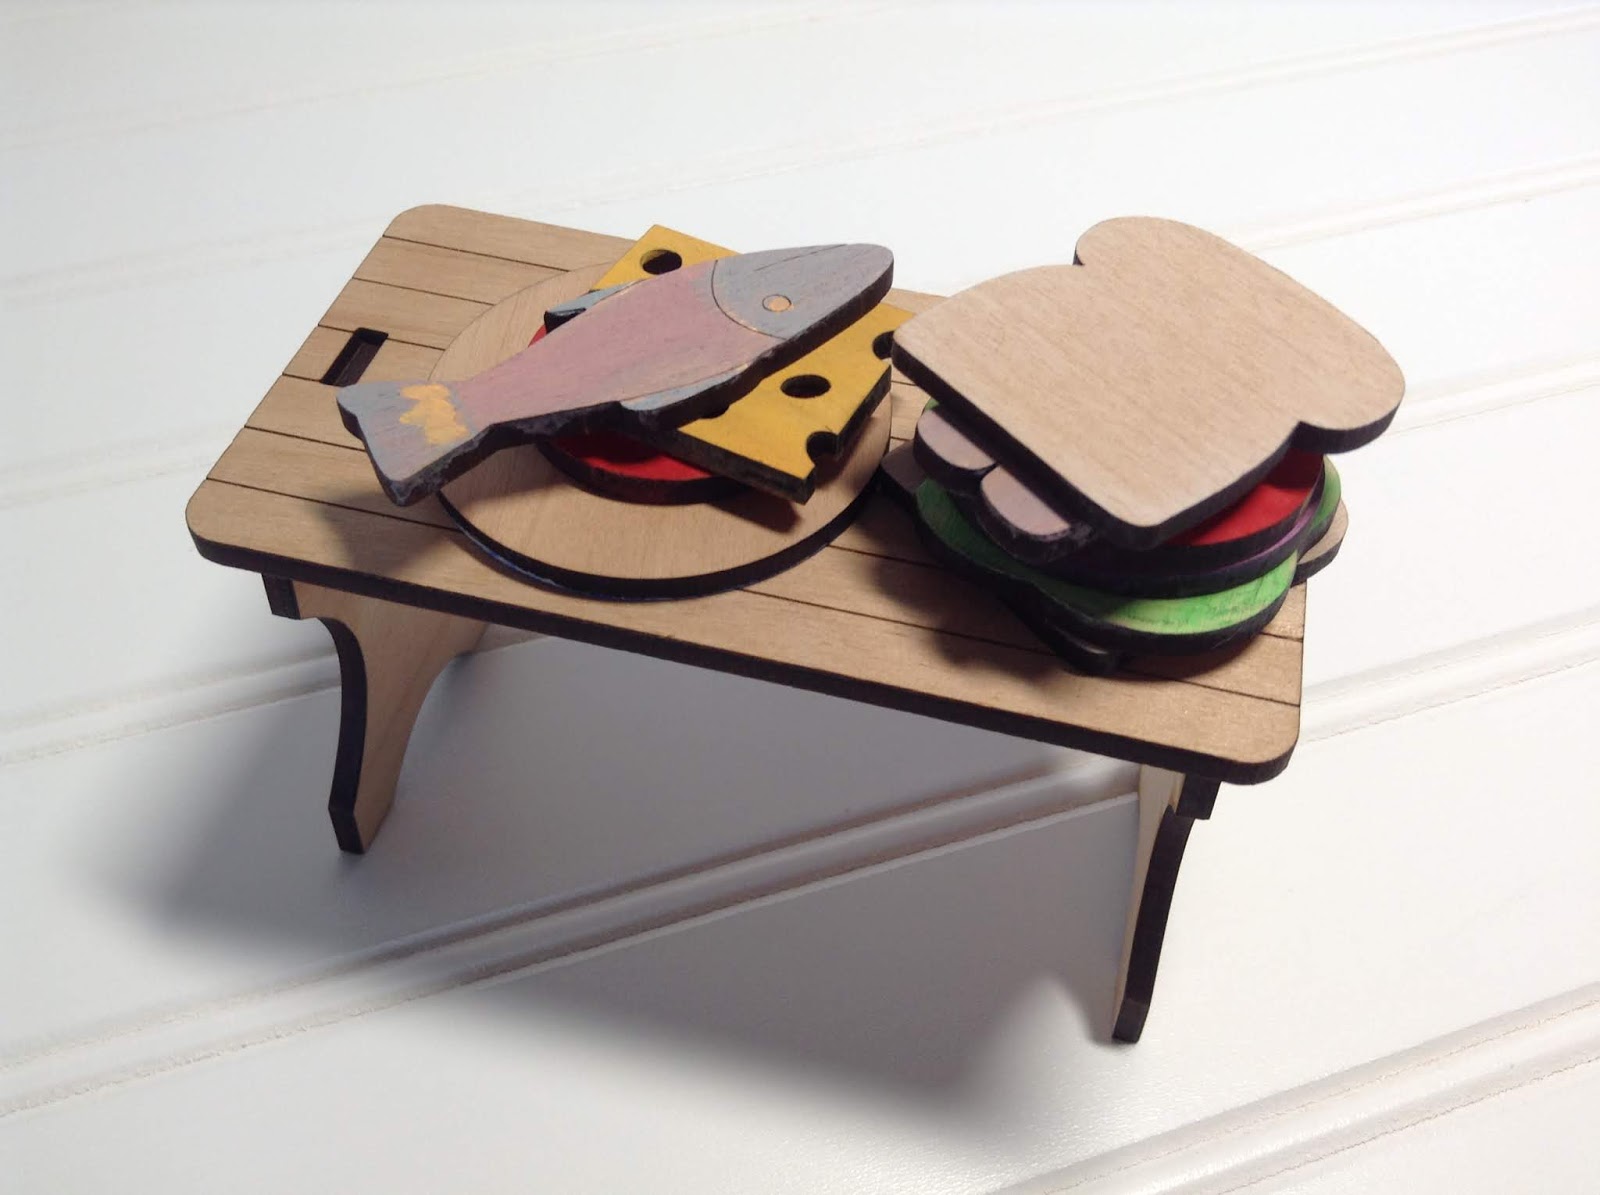
Table Assembly Instructions


Use tacky glue on the tabs of the table supports and
 place the tabs into the table side slots


Next, put a dot of glue on each of the upper tabs on the table sides. 
Place the tabs in the table top. Let the glue dry, then the table is 
ready for all your tasty treats!

This kit and more are available here


Tuesday, March 24, 2020

Paint and Glue Tips

Paint and Glue Tips


Thin your paint
Painting is easier if you add a drop or two of water. 
For a lighter effect, make a paint wash by adding a drop or two more of water to the paint on your palette. 
Let the paint dry on the wood between coats, as it is hard to tell how dark the paint is until it dries.

Paint coloring alternatives:
Colored pencils (Sharpened colored pencils are great for coloring in tiny details.)
Water colors
Gel pens
Sharpies

Use Handi Tak
Handi Tak is great for holding down small parts while you paint

Glue
Let white glue sit for a minute or two on the wood surface to get tacky before sticking the pieces together.

Recycled containers
Use a plastic lid from a yogurt or other container for a disposable palette.

I love this idea of using a milk jug for rinsing paint brushes. The wavy cutout makes a great brush holder too!

 Toothpicks

Toothpicks can be used to:
Mix paints
Apply glue
Scrape unwanted paint from the engraved outlines
Make tiny paint dots
(You can also use the ends of paint brush handles to make different sized paint dots)


Thursday, March 19, 2020

Assembling Your Easter Bunny and Rabbit's Ranch Paint and Play Kit

Assembling the Basket or Nest Box


For the handle, you can use twine, yarn, embroidery floss, wire, whatever you have on hand. If you have thin string, you can braid it to make a thicker handle. 

Now tie on the handle, and your basket is finished! If you want to paint your basket, tie the handle on after the paint is dry.


Assembling Your Garden Bed


 Glue the side panels to the garden base. 

Make sure to line up the ends.

 You can fasten a rubber band around it to hold it together while the glue dries. 

Now you are ready to paint your garden bed!


Have fun playing!


These kits and more are available here


Saturday, May 21, 2016

Assembling Your Guest Book Puzzle

Our puzzles are sent partially assembled. The puzzle is separated in parts that will fit the cardboard sheets, that fit the shipping box. 
They are packaged in order: left to right, top to bottom.

A 100 piece puzzle layout

When you remove your puzzle from the box, place the sheets on a table and lay them out in order. The top sheet is usually the center piece, (and sometimes also some center rows that didn't fit in the larger parts). The next layer will contain the upper left corner.

A bag of extra pieces is included with each order. A few of the extra pieces are for trying out pens on. The rest of the pieces are replacements. You will want to keep these until after your event. A guest may make a mistake when signing their puzzle piece, or once in a while a piece or two may go missing. The extra pieces may come in handy for just such an occasion. :)

Extra Puzzle Pieces
To assemble a puzzle that is in separate pieces, such as after your event, the trick is to make sure all the tabs are facing the same direction.

 For regular round tab puzzles, the tabs go up and to the right.


 For heart tab puzzles, the tabs go up and to the left.


 It helps to look at a picture of the puzzle to know the layout it should have. Refer to the listing you ordered your puzzle from for a photo of your puzzle layout.


Puzzle dimensions can be found here

Edges

Here are some pictures to help figure out the edges. They can be the hardest part.

Edges on a Round Tab Puzzle

Corners on a  Round Tab Puzzle


Corners on a Heart Tab Puzzle

NORTHERN OWL CREATIONS


Saturday, July 11, 2015

Choosing Options for Your Guest Book Puzzle

Choosing Your Options

We offer many options for your guest book puzzle, so you can have the puzzle that best suits your style and wedding theme. Our puzzles feature a custom designed main piece. You can have your wedding logo, monogram, theme and custom text laser engraved on the wood. Browse our Etsy shop listings for ideas, or use your own idea. We can design a special piece, just for you.  We offer two styles of wood for your puzzles. They can be cut from the same board (same grain) or from a mix of woods (mixed grain). Mixed Grain pieces are a pretty mix of shades and wood grain for added dimension, and add a rustic element to your puzzle. The borderless mixed grain with regular tab puzzle pieces are a popular choice, because they are reversible, so there is no "wrong side" for guests to sign. Another benefit of the mixed grain pieces, is that they are easily replaceable. 

Tab Types

We have two options for your puzzle piece tabs. They can be heart-shaped, or the regular round shape.

Our Heart Tab Puzzle 


Regular Round Tabs


Border Options

Our Borderless (Forever Puzzle) pieces can be arranged in a rectangular or square configuration to fit a table at your wedding, or a frame on your wall. There are no edges, so you can add to your puzzle at any time. Pieces can be added for anniversaries, or other special occasions. 


Borderless-Forever


With Edges- Your puzzle can have edges with squared corners, or rounded ones.


Round Corners


Piece Sizes

The puzzle pieces come in three sizes. 1.5 x 1.5 inches, 2 x 2 inches, 

or 3 x 3 inches.


Thursday, January 1, 2015

Ideas for Displaying Your Guest Book Puzzle

Photo by Deborah Jolly and Kara Jolly

How to Get Your Puzzle Ready to Frame

The easiest way to stabilize your puzzle, is to tape the back with masking tape. This is less messy than glue, and won't damage the wood or signatures on the front of the puzzle. When your puzzle is taped, it is easy to pick up and position in a frame. It is also less permanent, so you can move pieces around later, should you ever wish to.


Frames

When choosing a frame, you will want to check the back of the frame and make sure it is a little deeper. Some frames are thin and barely hold a paper thickness, but many will have some clearance for matting, etc. You will want one of those, or a shadow box frame would have plenty of space for the puzzle thickness.

Photo by Katie & Tim


Make a Photo Guestbook Puzzle   

Photo and Idea by Donna Brown

I used clear packing tape on the backside to hold the pieces together. Then I made a mat for the back out of foam poster board. I cut "doors" in the mat so I could change out the pictures if I wanted to. I glued the mat to the back of the puzzle with Mod Podge. Then attached the Command strips to the mat. The puzzle was mounted using Velcro Command wall mounts. 
Violá! :-)

Wood puzzle pieces can be ordered here.